Island Paradise: Learning Renderman
- Nathan Neville
- Dec 31, 2022
- 4 min read

Updated: Feb 5, 2024


Concept Designing
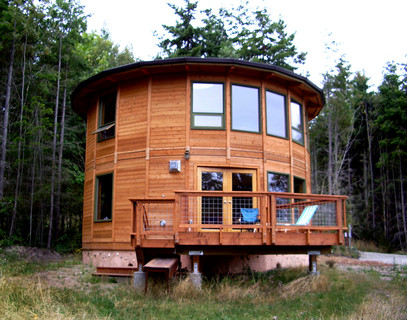
In this final project for my advanced 3D modeling course, I was tasked with creating a fantasy environment. This could be whatever I wanted it to be, I had creative freedom for once which was relieving and stressful at the same time. I needed to appropriately analyze my skills and make sure I created a concept that I could actually model and render within the time frame of the project. Initially, I wanted to create a Cyberpunk-like city in the middle of a desert. Similar to the works of Simon Stålenhag; one of my favorite artists. After trying some concept art myself I realized that this was just going to be too much work. I needed to choose something simple so that I could get the details right. A big part of this project was utilizing Pixar's Renderman so I felt like that would be enough challenge for me so I needed to choose something I could model relatively easily. Below are the concept images I created as well as images I used to inspire the design of the model.


Basic Blocked Out Models
My next step was to create a general blocked-in design on where everything would go and how everything fits together. As you will see, I immediately stated veering off from my concept with the spiral staircase because I thought it would not look real enough. I also had the audacity to believe I could also do an interior as well as an exterior in this time frame. I wanted this to look pretty realistic so using a cone as the mountain was not really going to cut it. Below are the blocked in designs I created.


As you can see, I was not going for realism here. At the time I wanted to create two houses with a bridge between the two but there was no real way to get down to the beach area I wanted to include. I used these images as inspiration to see what I wanted to model initially but in the end I had to start over from scratch.
Final Modelling & Texturing
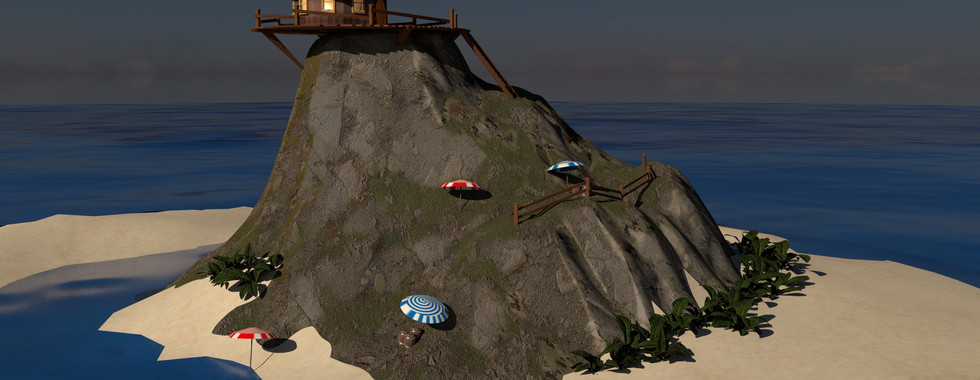
Now was the time where I needed to start creating my final models to get ready for texturing. The first challenge I needed to solve was how to create a realistic looking island or mountain. I wanted to create something similar to the large rock in the concept images. I was able to find a displacement map of a mountain online that I was able to turn into a brush. I used that to basically draw the kind of island I wanted. This worked wonders and so much better than I thought. This gave me a lot of confidence to keep going because what I thought was going to be the hardest part was over within 20 minutes. Next I started on the large deck that was going to be on top of the island. I just beveled some long rectangles and then built it like a real deck, board by board. I laid some support beams and modeled the fence post bits around the deck. The mountain I had created has a natural slope down to what was going to be the beach area. I used this to make a fence along the slope do that it would look like a place for people to walk. I modeled some barrels and umbrellas to give the place some signs of life. The house was also not too hard to model, I used a low poly cylinder to represent the structure of the wood beams, and a cone for the roof with wood slats to also show structure.
Now it was time to texture everything with Renderman. I had some experience in class so I sort of knew the ropes but the real challenge was going to be getting the rock texture and displacement to look real. Luckily, renderman as all the tools I need to do that. I found a tutorial online about creating procedural generated rocks with renderman. So I thought I would try it, so I downloaded some rock and grass textures from Polyhaven and used those in the node editor to create a multi-textured material that had no hard edges. At first, it did not work very well because there were a bunch of strange triangles within the texture. I only found out later that it was because the UV mesh for my island was all tangled so I had to unwrap that, then it worked great. I was able to use these textures as a bump map which gave it some elevation. Then, I used a combination of Renderman's default materials and various wood textures i found online to create the rest of the materials for the island.
For the ocean and sand, I used a ocean texture and turned it into a displacement map, then applied that to a plane. Renderman has a water material that I was then able to apply to it. I had to create a couple sand layers because since everything was on a plane, there were corners that you could see underneath the water. With some sculpting I was able to create a slope for the beach area that tapered off into a plane under the water. Below are my final renders from Renderman and I think they turned out wonderful! Please feel free to contact me with any questions about this project as it is my largest one to date.


Comments